Strawberry Freezer Jam

During our busy weekend at the first of the month, we made some freezer jam. Through Bountiful Baskets, I ended up with 8 pounds of strawberries.  YUM

My 8 lbs of strawberries ended up being roughly 16 cups of chopped strawberries:

  • Let boil for 15 minutes.
  • Then use a potato masher or an immersion blender to break up the chunks.
  • Add sugar to taste.  My family does not like traditional sweet jam/jelly, so I sweeten conservatively….maybe 1 1/2 cups went in.
  • Regular fruit pectin.  I followed the directions based on the amount of strawberries and used 7/8 cup~ Along with about 2 cups water.  Boil for a minute and then add to the strawberries.

  • Stir, stir, stir.
  • Ladle into your freezer safe containers.

Then you are done.  Enjoy!  So yummy.  This is my second go around with this recipe and the whole family loves it.

Homemade Fruit Leather

Last week, I found myself with 60 apples.  I was pretty positive that we couldn’t eat them all before they went bad, so I decided to make some apple fruit leather.

I started by prepping the apples – washing, peeling, coring and slicing.

I did about 30 of the apples to start with.  The sliced apples were put in the largest pot I own and I added just a bit of water to assist with the cooking process.  I brought the water and apples to a boil and then let it cook for about 15 minutes.  This made mashing up the apples easier.

I then put the cooked apple mash into my blender in batches to get a good puree.  I then put the heat on the pot again and started taste testing.  I did not want to add much sugar so I ended up with less than 1/3 cup.  I would add a bit in, stir and taste test until I was happy.

I lined my lipped pans with microwave safe plastic wrap and then put the apple puree filled pans into the oven at 170 F overnight (12 hours).  You know its done when it is not sticky anymore but is not crunchy.

I let the leather cool in the pans and then pulled them.  To store I rolled them up and put them in the fridge.  With the 30 apples I ended up with 4 9×13 pans and 2 9×6 pans.

Yummy!!

Ginger Shrimp with 3 Fried Grit patties and Asian slaw

This is the most delicious dinner….but my recipe on this was all about throwing something together so I could get fed.

  • shrimp
  • canola oil
  • lemon juice
  • soy sauce
  • ginger
  • minced garlic
  • grits (spread into a sheet less than 1 inch thick and refrigerate)
  • 1 egg or egg substitute
  • bread crumbs
  • honey
  • rice vinegar
  • cabbage – shredded

IMG_2446Peel and de vein the shrimp – place in a bowl to marinate with a glug of canola oil, minced ginger, a teaspoon of garlic, teaspoon of lemon juice and teaspoon of soy sauce…..marinate as long as you can.

IMG_2447To make the sauce for the shredded cabbage – add together additional minced ginger, rice vinegar, garlic, dash lemon juice, canola oil and soy sauce…..all of the liquid was added in equal parts and the garlic and ginger was roughly 1 teaspoon.

IMG_2450I pulled the sheet of grits from the fridge and cut 3 round pieces out with a cookie cutter an inch and a half in diameter.  I ran each one through an egg wash and then bread crumbs.  Place in pan with heated canola oil until each side in nicely browned.

IMG_2451I then placed the marinated shrimp into a hot pan and cooked for a few minutes on each side…..till they were a pretty pink color.

IMG_2453For plating – I place the shredded cabbage on the side with the sauce over.  I added some tomatoes…..cause I love them.  The three grit circles go down and then I place the shrimp on top of those……added some more of the sauce from the cabbage and ATE IT!!!


Easy Chicken Tikka Masala

My cousin made this for me years ago, and I begged her to find the recipe so I could make it for Dave and the girls.  She pulled through for me and searched through her plethora of recipes and found it!!  Click here for an electronic expanded (original) version. (jamieoliver.com)

I adjusted the electronic version for ease and for my family’s taste.

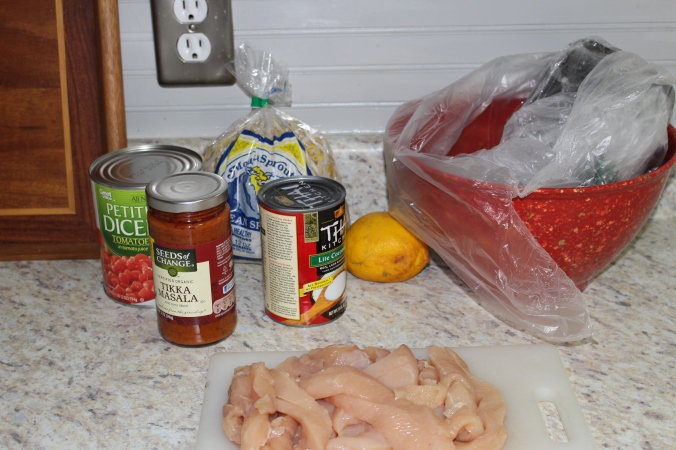
1 lb. chicken breast sliced into strips – or shredded chicken thighs

1 onion – sliced

1 serrano chile – seeded and chopped finely

fresh ginger (I used a piece 1 inch long and 1 inch thick) – peeled and thinly sliced

oil and butter

14 oz’s diced tomatos

14 oz’s coconut milk

1 jar (12 oz) tikka masala sauce – I used Seeds of Change (this is a time saver)

4 oz’s of sliced fresh mushrooms

handful of bean sprouts – use based on how much your family likes them

rice and/or Naan (I purchased pre-made in the interest of time as well)

lemon – if you like it

rice vinegar to taste

IMG_0064I placed a pat of butter and a glug of vegetable oil into a pot and started sauteing the sliced onions, serrano chile and sliced ginger.  Man does this part smell amazing.

IMG_0063Not kidding….this part smells so good.

Once the onions are translucent – add in your sliced or shredded chicken and the tikka masala sauce.  Toss that around for awhile, then add in the diced tomatos and coconut milk.  I simmer this for roughly 20 minutes – ensuring that it never gets dry (you can add water if needed).IMG_0065
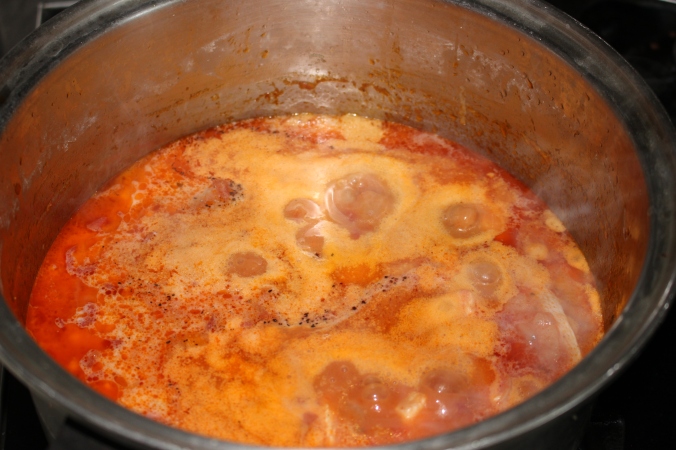
This is when I taste test……I tend to do it often….just to make sure the sauce is yummy.  Here is where I season to satisfy the family.   I added some salt, pepper AND rice vinegar……that is a specific taste and my kids love it…so in it went.  While this is simmering and between tastings – I made some rice and I pulled my small cast iron skillet out to saute the mushrooms and bean sprouts.

annnnnnnddddddddd.  Done.

IMG_0070I layered rice first, then the chicken tikka masala, and then the sprouts/mushrooms.  Naan to the side and a slice of lemon to squeeze if I so desired….and I so desired.